
We did this in 2 days (2 one hour classes) and these are going in the art show again this year too!
Day One: Attaching the Monster to the base and Painting!
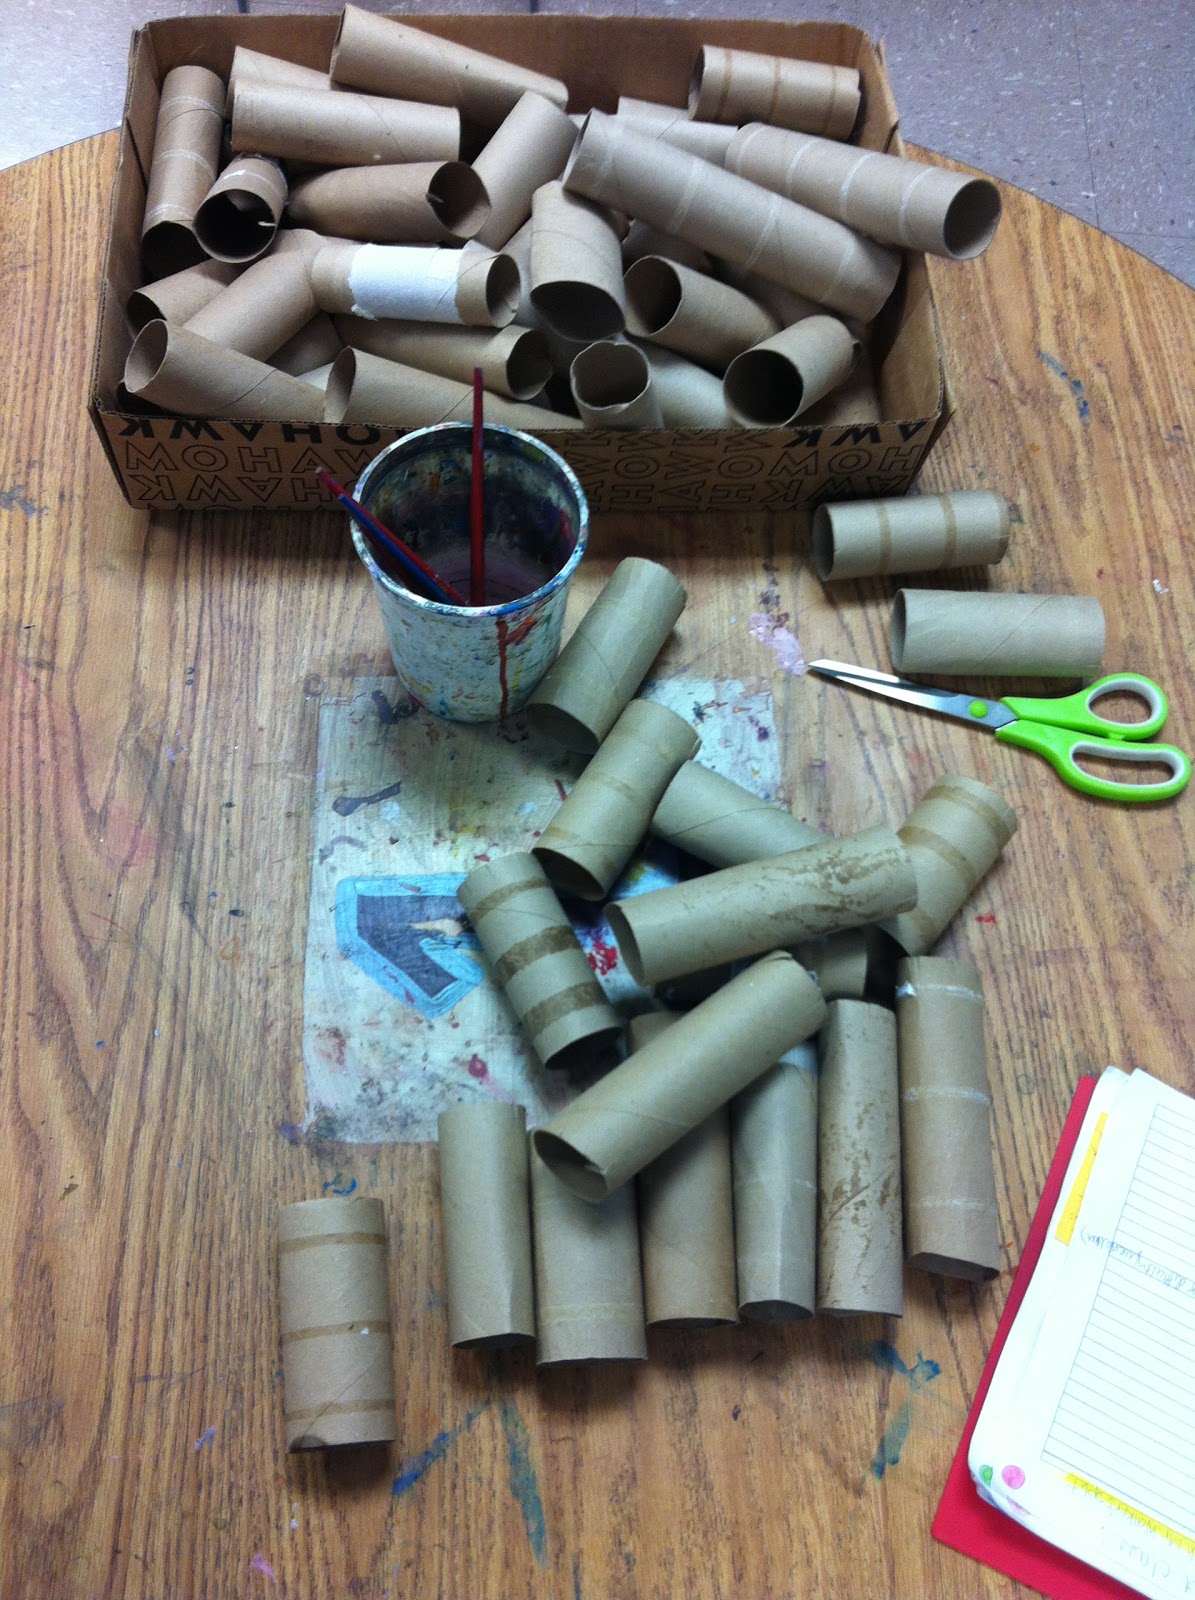
Teacher Prep: Cut down cardboard tubes to about 5 inches high...and cut little 1/2 inch slits in the bottom of each tube. Also cut a cardboard box into 3"x3" squares or bigger for the sculpture base.


We 'peeled' back the little tabs at the bottom that I pre-cut and glued them to the base with tacky glue.
The kids pressed down the top of the tub to create "ears" for their monster.

We also had a little color theory review since they had blue, yellow and white paint...they could mix as they pleased and some remember that they could make green. How quickly we forget.

They bring them to me when they are done painting ALL THE BROWN SPACE! Except for the bottom where I have written their name and class code. We talked briefly about good craftsmanship.
DAY TWO: Adding facial features to our monster!
Embellishments!


I wanted them to create at least 2 layers of contrasting colors for the eyes...so we did that first and then I let them choose googly eyes.
Also we cut out the mouth and added teeth with oil pastels before we glued on...I learned that the hard way with the first class.

We added paper sculpture techniques to create grass, water or fire for our monster's environment.

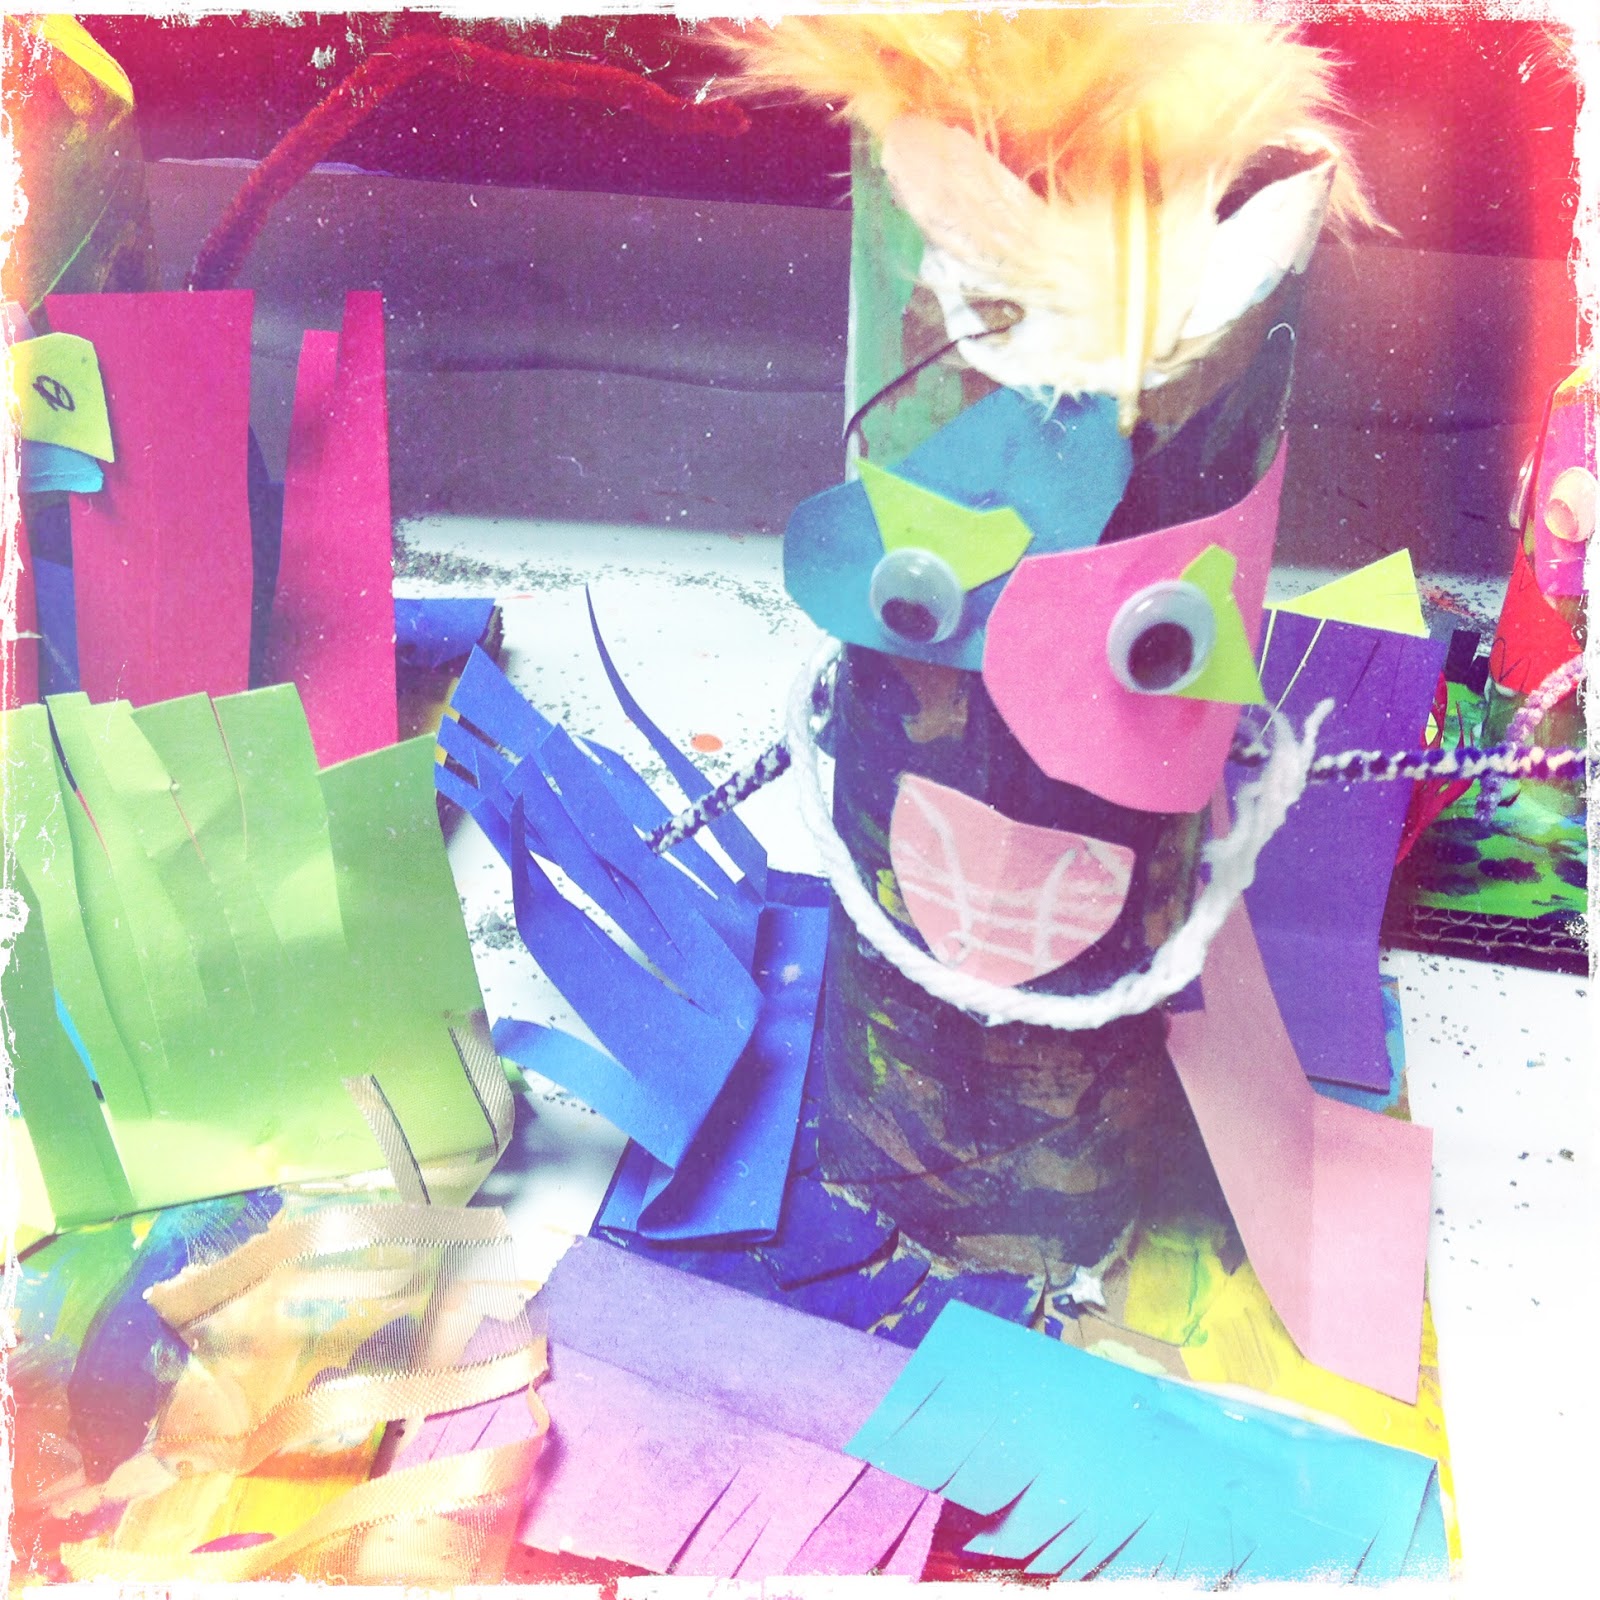


Of course I had to get the feathers out and they could pick 2 feathers for either hair, wings or a tail.
The arms are pipe cleaners and showed them some wire bending/twisting techniques and I used an awl to poke holes in the sides of the tube for the pipe cleaners.
Love them! :)
ReplyDelete