Showing posts with label designs. Show all posts

Saturday, August 22, 2015

Sub Lesson: Tracing Shapes and Drawing Patterns

This is my number one sub lesson that I can leave in the "sub tub" for my emergency lesson or for my "I'm feeling lazy lesson". 

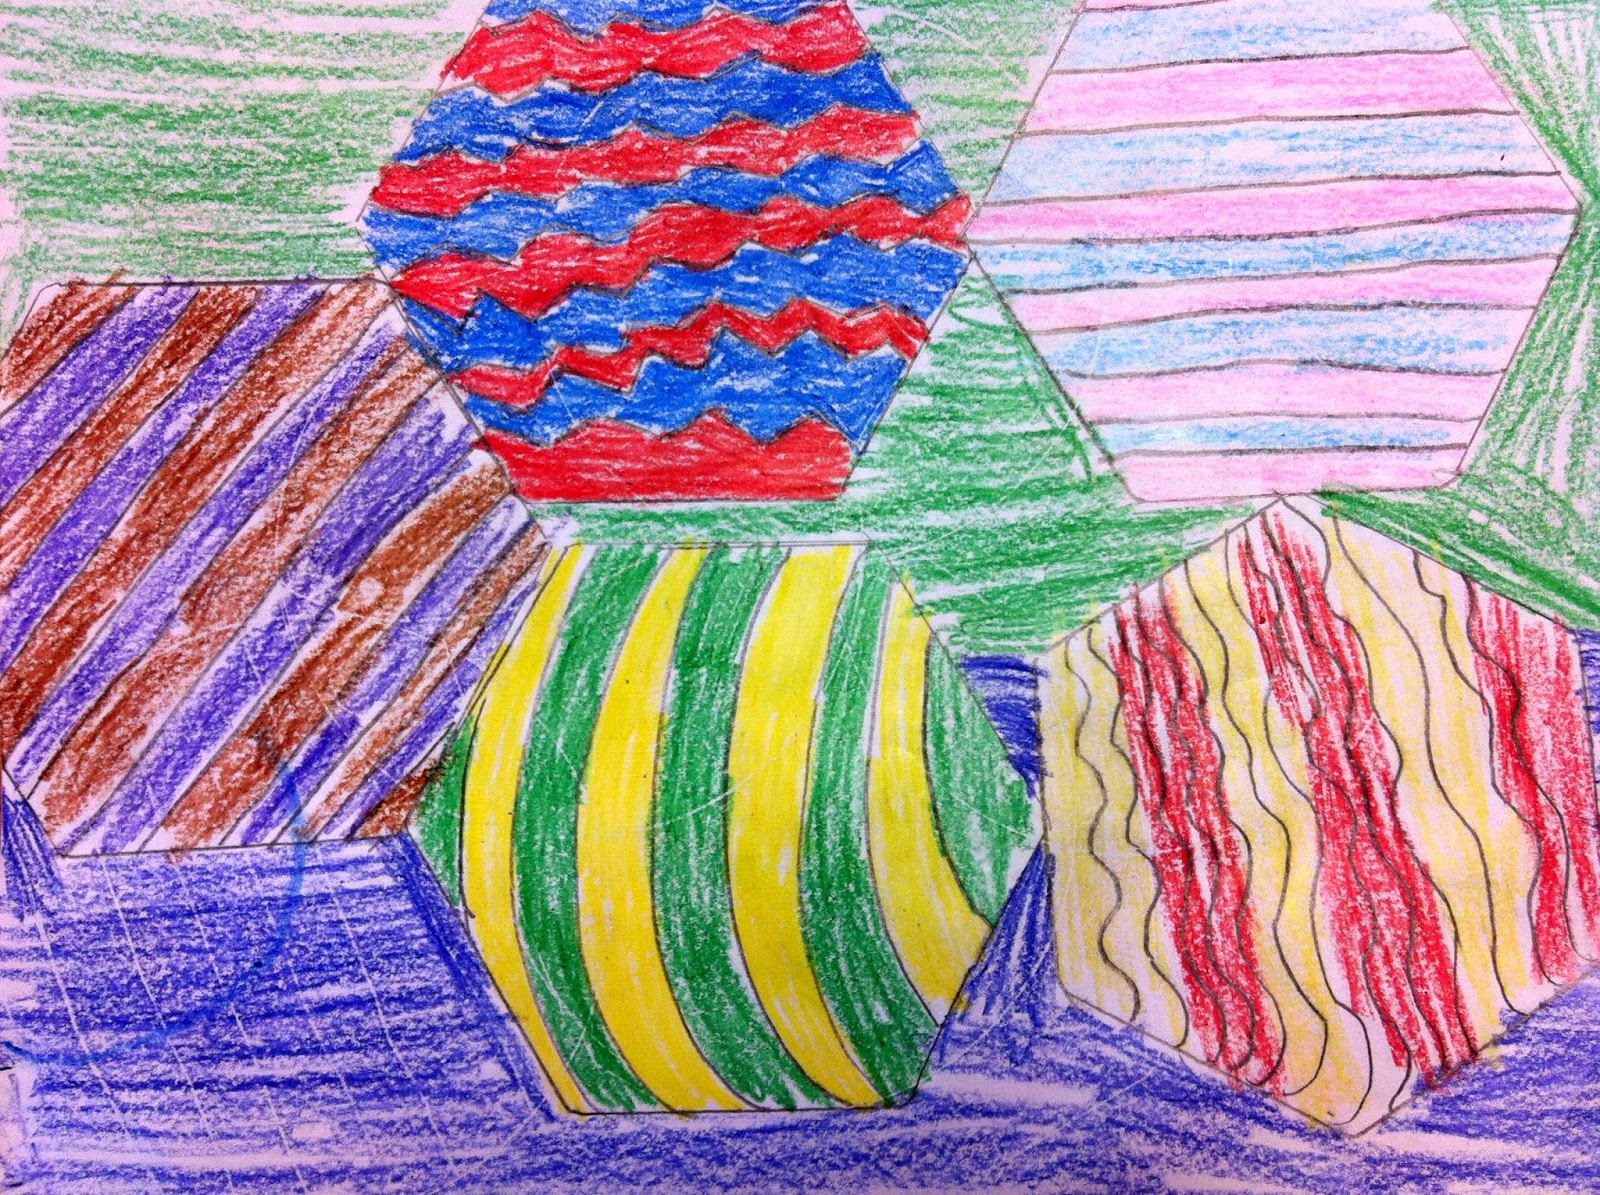
The directions are simple: Pick an object from the bucket and trace it at least 5 times on your paper. 
 (I have some simple plastic shapes: circles, triangles, squares... and I also have a bucket of more complex shapes like cookie cutters, cd's, and other random objects for the older kids.)

Once the student traces their object, they draw different patterns and designs in each shape with a pencil. Once they have filled the shapes, they color with crayons. 

Then, they design the background...or incorporate it into the design early on. 

This usually lasts the whole 60 minute class period, but I always leave some "extra time" activities just in case. 


Saturday, April 26, 2014

Pysanky Eggs

I decided to do something somewhat “eastery” for the Thursday before Good Friday. I decided to try Pysanky Eggs with Kindergarten. They did a great job!

We read the story “Rechenka’s Eggs”  by Patricia Polacco. There are a lot of fun Russian names in this story that the kids enjoyed hearing. I hope I was pronouncing them correctly.

IMG_3963IMG_3964IMG_3965IMG_3967

The book was about an old Russian lady who makes amazing designs on eggs for the big festival and stumbles upon a wounded bird that she takes in when something magical happens.

IMG_3939IMG_3940IMG_3941IMG_3942IMG_3943IMG_3944IMG_3945IMG_3946

To really make this fun, I let the kids decorate a plastic egg with their designs in sharpie. We rolled up a little piece of paper with information about Pysanky Eggs and stuffed them inside.

IMG_3947IMG_3948IMG_3949IMG_3950IMG_3951IMG_3952IMG_3962

Tuesday, April 15, 2014

Trash Trucks 2014


Each year, I’m proud to say, we participate in a poster contest to raise awareness for recycling, reducing and reusing. This is part of the Nashville Beautification Project in association with Red River Waste Collection trucks. I select two artists’ poster designs to submit for the contest. This year, James and Isabel’s art was chosen and they are honored to have their work seen by over 9,000 Nashvillians daily.

On Monday, we had the visit from the trucks and I request that the students wear green or blue shirts to support “going green”. This year’s theme was Earth Day Every Day…

We got some classic photos this year…

IMG_3871IMG_3878IMG_3882IMG_3887IMG_3890IMG_3870


All this chaos happened during my 3rd grade hour, and with 30 minutes left of art class, I decided to have the kids create a group poster project promoting recycling, reducing or reusing. They worked really well together and made some neat posters.

IMG_3901IMG_3902IMG_3903IMG_3905IMG_3906IMG_3907

IMG_3908IMG_3909

I made them present their poster as a team for one minute.

IMG_3910IMG_3911IMG_3917

Overall, a successful hour of Earth Day Every Day thoughts!

Sunday, September 29, 2013

Roberto the Insect Architect: A Scobey Classic

Here's a yearly project I do with 1st graders. It's simple to execute, but teaches them lots of new vocabulary words. It also builds a foundation for the rest of their "art career" with me....think of all the architecture we talk about as art teachers...now I can always say...remember "Roberto the Insect Architect" ....and it all comes back.

Day One: We write about "Architects" in our Idea Books...(I think next year we shall be calling our idea books, "iBooks"...gotta love apple.)

We do 3 sketches of houses for bugs in our Idea Books. They will be choosing their favorite for their large blueprint drawing. After reading the story, writing in our books, sketching time and the demonstration, we usually get the pencil drawing done of the big house and that's all we have time for!

The key to this project is drawing a large bug first, then adding architectural details to the bug to transform it into a house.

Day Two :We outline our Bug House in blue permanent marker and then we paint with blue watercolors to create the "blueprint" effect. I have loosened some of the reigns and added greens and purples to the paints so they can paint grass and windows different colors.