Monday, February 27, 2012

Artist Visit @ DuPont Elementary!

Wayne Brezinka
Local Artist Visit
February 27, 2012

Today, one of our 4th grade classes had the awesome opportunity of seeing the artwork of local Nashville artist
 Wayne Brezinka.
He came to talk about his artwork, his process of working with mixed media collage and also about how he makes a living with his artwork. Everybody was super involved, asking questions and thinking about having careers in art. When asked, "How many of you love art?", almost every hand in the room went up. A teacher tear came to my eye.

We had such an enriching experience! What a lucky group of kids.

Visit Wayne's website to see some of his collages and publications. Great resource!
Here's some photos of his visit:


The project we are working on in collaboration with Wayne is a self-portrait mixed media collage. In a previous class I introduced the concept of collage and traced everyone's silhouette on a large piece of 9x12 paper. They are using all kinds of random papers to add details to their self-portrait. I think they're gonna look really great! 

3rd Grade Collograph Fish Print

Printmaking with 3rd Grade

Collograph Fish Print with Australian Aboriginal Dot Painting

First we created a collograph using manilla folders. Basically, we drew a fish, then built up 3 layers of details. Fins and patterns basically. They could create designs and patterns in the background for an environment but not many did this.


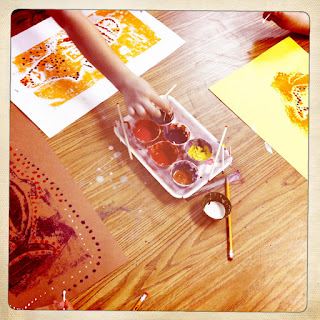
The print station. We did 3 'printers' at a time. I started mixing ink...such a great idea! Orange and yellow....blue and purple/red.....green and yellow. The colors look so much better with a little extra something.

Here's yellow and orange mixed together...


Peel and reveal!


The key to this part is giving them sticks to use and lots of tempera. For the first class, I gave them acrylic paint in little blobs and I only handed out q-tips. After seeing the dot paintings at the mayor's art show right now, I realized they needed more paint! And other tools....so we've been using toothpicks, wooden sticks and qtips.


Printmaking Intro for 1st Grade

Printmaking
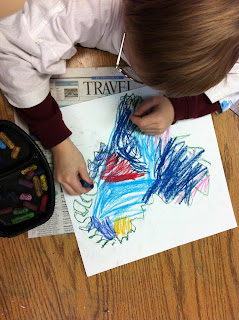
We are studying printmaking with foam plates and incised lines. To introduce this concept we made a 'mini-plate' with an image of a fish. They stamped their fish in their idea books first to get the hang of the process, then created a pen drawing of a habitat. We used peeled crayons so that we could color lightly and quickly, then printed our mini-fish into our habitat using markers. They turned out great for a 15-20 minute project!
Here's an Idea Book with one of our graphic organizers. I usually have them make word webs because for me this is the easiest way to organize information quickly. Pretty great for first graders.


Printmaking Day Two

This whole project was inspired by a deepspacesparkle lesson for 3rd graders. Instead of using brayers and messy ink, I have borrowed the idea of just using paint. SO much easier, especially with a room full of 1st graders.

First, we used 'cool color watercolors' to paint a watery habitat for our fish. They could be as creative as they wanted. Usually, I'm a stickler for not leaving any white paper showing, but I'm starting to loosen up on that. Anyway, after they painted I demonstrated how to incise their fish into their 'large foam plate'. (Teacher prep: cut up styrofoam plates if you are on a budget! Super cheap!)


So while our paintings were drying, they lightly drew their fish on the plate in pen. We started out light so we could make changes to our fish before incising the lines permanently. Once they were happy with their drawing, we traced over our lines with lots of pressure, but not too much! Don't want to poke through to the other side.
Finally, we used 'warm color tempera paint' to apply color to the fish, then we printed the fish at least 3 times into the environment. They are turning out great! Some are better than others, but I'm happy they are understanding the process of printmaking.


Saturday, February 11, 2012

African Masks ....Groundhog's Day


Well, due to Christmas break I still had one class who needed to spray their African masks with clear gloss and since our winter has been so nice we went outside, of course, to spray them. It just happened to be Groundhogs's Day and the kids were noticing their shadows, so we took some fun shadow pics.


Jim Dine Pop Art Hearts!

Well, I've been sick all week but I have managed to squeeze out a deepspacesparkle.com inspired project about Jim Dine the pop artist. I've been doing this with Kinders and 1st grade and I am so impressed at their abstract expressionism! I wish I had more projects that allowed for this kind of freedom within the bounds of the project.

Step One: Trace a heart with a pencil on white drawing paper. I cut the paper to 12"x12" squares. And I precut about 20 hearts of different sizes and spread them out on their tables.


If they don't get the heart perfect, no worries. It looks more hand-drawn that way which is always better.

Step Two:  Outline your heart or hearts and start adding your own designs, colors or patterns. Be creative! I also showed several images of Jim Dine's heart before beginning the project for inspiration.

We used oil pastels because they are painting with liquid watercolors.

They could color in as much as they wanted....leaving a little white paper peeking through is good for the next step though.


Step Three: Paint all the white space left with liquid watercolors.